
Making fresh ravioli at home is one of those experiences that feels both deeply satisfying and incredibly rewarding. Rolling out the dough, preparing the filling, and shaping those perfect little pillows brings together the joy of cooking with a sense of tradition that has been passed down for generations in Italian kitchens. What I love most about making ravioli is that it never feels rushed. The process invites you to slow down, work with your hands, and create something special that you can truly savor. Whether I’m cooking inside my RV after a long day of exploring or at home in my kitchen, ravioli always feels like a meal worth celebrating.
Gathering the Ingredients
Every great ravioli begins with a few simple ingredients. For the pasta dough, all that’s needed is all-purpose flour, eggs, a pinch of salt, and sometimes a drizzle of olive oil. The filling is where creativity shines. Traditional recipes often feature ricotta cheese, spinach, or meat, but I’ve experimented with everything from roasted pumpkin to seafood. When I’m traveling in the RV, I like to adapt the filling to whatever is fresh and available at local markets along the way. Shopping for ingredients becomes part of the adventure, and knowing I’ll soon be shaping them into ravioli makes the whole process more exciting.
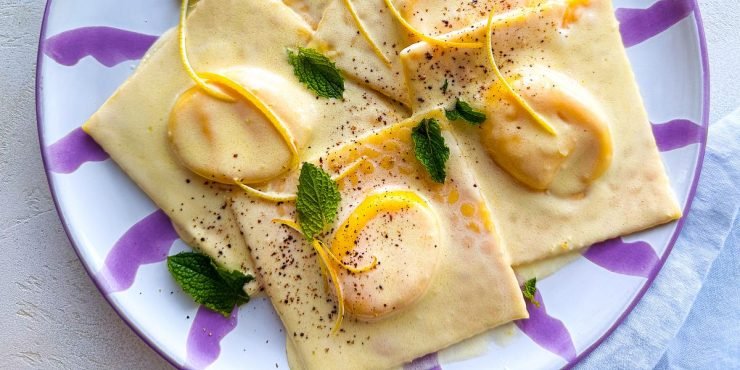
The key is to use fresh ingredients whenever possible. Good-quality ricotta makes all the difference, and if I find local herbs or seasonal vegetables, they immediately inspire the filling. Even a simple combination like ricotta, lemon zest, and fresh basil can transform a meal into something memorable.
Preparing the Dough
The dough is the foundation of ravioli, so it’s worth taking the time to get it right. I start by placing the flour on a clean surface and creating a well in the center. Into this well, I crack the eggs and add a pinch of salt. Using a fork, I gently beat the eggs, slowly incorporating the flour from the sides. It’s a method that feels rustic but effective.
Once the dough starts coming together, I knead it by hand for about ten minutes until it feels smooth and elastic. This part requires patience, but the effort pays off. If the dough feels too dry, a splash of water helps. If it’s sticky, I dust it lightly with flour. When I’m finished, I wrap the dough in plastic wrap and let it rest for at least thirty minutes. This resting period allows the gluten to relax, making it easier to roll out later.
Rolling Out the Dough
After the dough has rested, it’s time to roll it thin. At home, I often use a pasta machine, but when I’m camping in the RV, a simple rolling pin does the job. It just takes a little extra arm strength. The goal is to roll the dough thin enough that light can almost pass through it. This ensures that the ravioli won’t taste heavy or doughy.
I divide the dough into smaller sections to make rolling easier, keeping the unused portions covered to prevent them from drying out. Working one piece at a time, I roll it into long, thin sheets. This step always makes me feel connected to the rhythm of Italian cooking, where patience and attention to detail make all the difference.
Preparing the Filling
While the dough rests, I turn my attention to the filling. For a classic ricotta and spinach mixture, I sauté fresh spinach in a pan until it wilts, then squeeze out the excess water and chop it finely. I combine it with ricotta, grated Parmesan, a touch of nutmeg, salt, and pepper. The flavors come together beautifully, rich yet light.
Other times, I might roast butternut squash until it caramelizes, mash it into a smooth purée, and mix it with ricotta and sage for a comforting autumn filling. When I’m by the coast, I’ll even experiment with seafood, like shrimp and mascarpone, which creates a luxurious flavor that feels indulgent after a day of outdoor activities. The filling is really where creativity thrives, and making different varieties allows me to keep ravioli fresh and exciting.
Shaping the Ravioli
With the dough rolled and the filling ready, shaping the ravioli is the most enjoyable part. I lay one sheet of dough flat on the counter and place small spoonfuls of filling in evenly spaced intervals. Then, I brush around the filling with a bit of water or egg wash, which acts as glue. A second sheet of dough goes on top, and I gently press around each mound to seal in the filling and remove any air pockets.
Using a sharp knife, pastry cutter, or ravioli stamp, I cut them into neat squares or rounds. I always take my time with this step because I know that a well-sealed raviolo won’t burst in the boiling water. To be safe, I press the edges firmly, making sure they are secure. Laying them out on a floured surface prevents sticking while I finish the rest.
Cooking the Ravioli
Cooking ravioli is quick and simple. I bring a large pot of salted water to a rolling boil, then gently drop the ravioli in a few at a time. They only need a few minutes to cook, and I know they’re ready when they float to the surface. It’s important not to overcrowd the pot, as ravioli are delicate and can stick together if there isn’t enough room.
Once they’re done, I lift them out carefully with a slotted spoon. At this point, the possibilities for sauces are endless. Sometimes, I go with the classic choice of melted butter, sage, and Parmesan, which highlights the pasta’s delicate flavor. Other times, I might prepare a light tomato sauce or even a seafood-based sauce if the filling pairs well with it. The beauty of ravioli is that it adapts to so many flavors.
Serving and Enjoying
There’s nothing quite like serving homemade ravioli. The effort that goes into every step makes the first bite incredibly rewarding. I like to finish each plate with a drizzle of olive oil and an extra sprinkle of Parmesan. Pairing it with a crisp glass of white wine always feels like the perfect way to complete the meal.
When I’m on the road in the RV, enjoying ravioli outdoors adds another layer of satisfaction. Sitting at a campsite table with a plate of fresh ravioli and watching the sunset feels like the perfect blend of comfort and adventure. Meals like this remind me why I love combining travel with cooking.
Tips for Success
Over time, I’ve picked up a few tricks that make ravioli-making smoother. Keeping the dough covered while working prevents it from drying out, which is essential for rolling and sealing. Using a piping bag for the filling helps keep portions even and neat, which also makes sealing easier. And most importantly, I always make a little extra because ravioli has a way of disappearing quickly once served.
If I’m short on time, I prepare the filling a day ahead and store it in the fridge. The dough can also be made earlier, wrapped, and refrigerated until ready to use. Freezing is another option; once shaped, ravioli can be placed on a tray, frozen, and later transferred to a bag for longer storage. Cooking them straight from frozen works perfectly.
Bringing It All Together
Making fresh ravioli at home is more than just preparing a meal. It’s about enjoying the process, experimenting with flavors, and creating something memorable. Each step, from kneading the dough to sealing the edges, connects me with a long tradition of pasta-making while allowing room for personal creativity.
What makes ravioli so special is its versatility. With countless fillings and sauces to explore, it’s a dish that never feels repetitive. Whether I’m cooking in the RV, at home, or for friends and family, ravioli always delivers a sense of warmth and satisfaction.
Homemade ravioli may take more time and effort than opening a box of pasta, but the result is incomparable. It’s a dish that celebrates simplicity, creativity, and care all at once. Every time I make it, I’m reminded that some of the best meals are the ones crafted by hand, shared with others, and enjoyed slowly.


Add comment