Italian ciabatta bread has a rustic charm that makes it stand out from many other breads. With its open crumb, chewy texture, and golden crust, it is the kind of bread that feels both simple and extraordinary at the same time. Baking ciabatta at home is not as complicated as many people believe, though it does take a little patience and care. I’ve baked this bread many times in my kitchen, and each loaf still fills the room with a fragrance that instantly makes me hungry. The process is rewarding, especially once you slice into the loaf and hear that familiar crunch.
The Origins of Ciabatta Bread
Ciabatta is relatively young in comparison to other Italian breads. It was developed in the 1980s in northern Italy as an answer to the growing popularity of French baguettes. Bakers wanted to create a bread that could stand up to sandwiches but still carry its Italian roots. The name ciabatta means slipper in Italian, referring to the flat and elongated shape of the loaf. Over time, it spread across Italy and eventually gained international recognition. Now, it is widely used for panini and enjoyed at family tables worldwide.
Ingredients That Make the Bread
The ingredient list for ciabatta is surprisingly simple: flour, water, salt, and yeast. What makes it special is not the complexity of the recipe but the way the dough is handled. High hydration is key, which means the dough contains a lot of water compared to the flour. This gives ciabatta its signature airy holes and chewy bite. Bread flour works best because of its higher protein content, which helps with gluten development. Some bakers also add a small amount of olive oil, giving the loaf a hint of richness, though the classic version relies only on the essentials.
Preparing the Biga Starter
Many ciabatta recipes begin with a biga, an Italian pre-ferment that adds depth of flavor and structure to the dough. Making biga is simple: mix flour, water, and a small amount of yeast the night before baking. By the next day, it will have bubbled and developed a slightly tangy aroma. This step is worth the effort because it strengthens the final dough and gives the bread its characteristic complexity. Every time I prepare the biga, I feel like I’m setting the foundation for the bread’s success.
Mixing and Handling the Dough
Ciabatta dough is wetter than most bread doughs, so handling it requires a gentle touch. Instead of kneading traditionally, many bakers use the stretch and fold method. This involves lifting the dough and folding it over itself at intervals during the resting process. The technique strengthens the gluten network without adding too much flour. At first, the dough feels sticky and unruly, but as it develops, it becomes smoother and more elastic. I’ve found that resisting the temptation to add extra flour pays off in the end with the perfect crumb structure.
Shaping the Loaves
Shaping ciabatta is more about guiding than forcing. The dough is divided into portions and carefully stretched into its iconic slipper shape. Unlike other breads, it doesn’t need to be tightly rolled or scored with precision. Its rustic look is part of its identity. Dusting the dough with flour before shaping helps prevent sticking, but it’s best to avoid overworking it. I always let the dough dictate its final shape, and the result is beautifully imperfect every time.
Baking the Bread
A hot oven and steam are crucial for ciabatta. The high heat ensures the crust becomes crisp and golden, while steam helps keep the dough flexible as it expands. I often use a baking stone or steel to mimic the effect of a professional bread oven. Transferring the dough can feel tricky because of its softness, but parchment paper makes it much easier. Within minutes of hitting the heat, the loaves rise and start forming that unmistakable crust. The smell alone is enough to make the waiting feel almost unbearable.
The Final Texture and Flavor
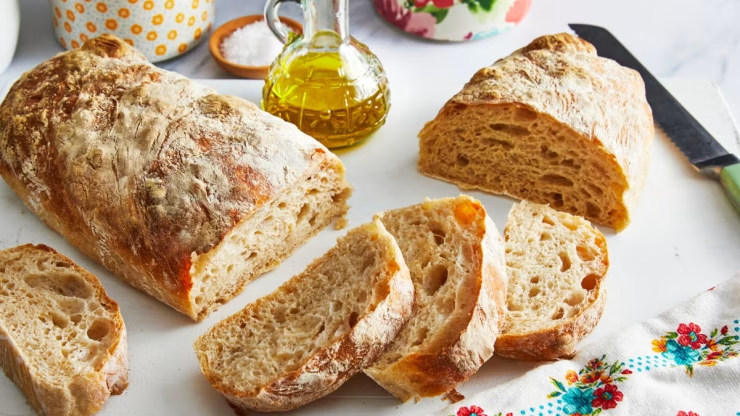
Once baked, ciabatta has a crackling crust that contrasts beautifully with its airy interior. The large irregular holes are exactly what bakers aim for, and they make the bread perfect for absorbing olive oil, sauces, or sandwich fillings. The flavor is mild yet slightly tangy, especially if a biga was used. I often slice it warm, letting the steam escape, and it’s always hard to resist tearing off a piece right away.
Serving Ideas
Ciabatta is one of the most versatile breads to keep at home. It pairs perfectly with soups and stews, where it soaks up every bit of broth. It’s also excellent for sandwiches, giving a chewy base that doesn’t collapse under hearty fillings. Bruschetta made with ciabatta is another favorite of mine, especially when topped with tomatoes, basil, and a drizzle of olive oil. The bread can even be grilled, enhancing its flavor with a smoky note.
Why Baking Ciabatta at Home Matters
There is something satisfying about making ciabatta in your own kitchen. Not only does it connect you with Italian culinary tradition, but it also gives you control over the freshness and quality of the bread. Store-bought versions often lack the same character, and they can never match the aroma of a loaf pulled straight from the oven. For me, baking ciabatta is not just about bread, it’s about slowing down, working with my hands, and appreciating food in its purest form.
Final Thoughts
Ciabatta bread may look rustic and unrefined, but that is exactly what makes it so appealing. The process of making it teaches patience and rewards precision, even if the steps feel simple. Every loaf is slightly different, carrying its own unique shape and crumb pattern. Baking ciabatta at home is one of the most rewarding bread-making experiences, and once you taste it fresh, you’ll understand why it has become a staple both in Italy and beyond. I’ve never grown tired of baking it, and I doubt I ever will.


Add comment