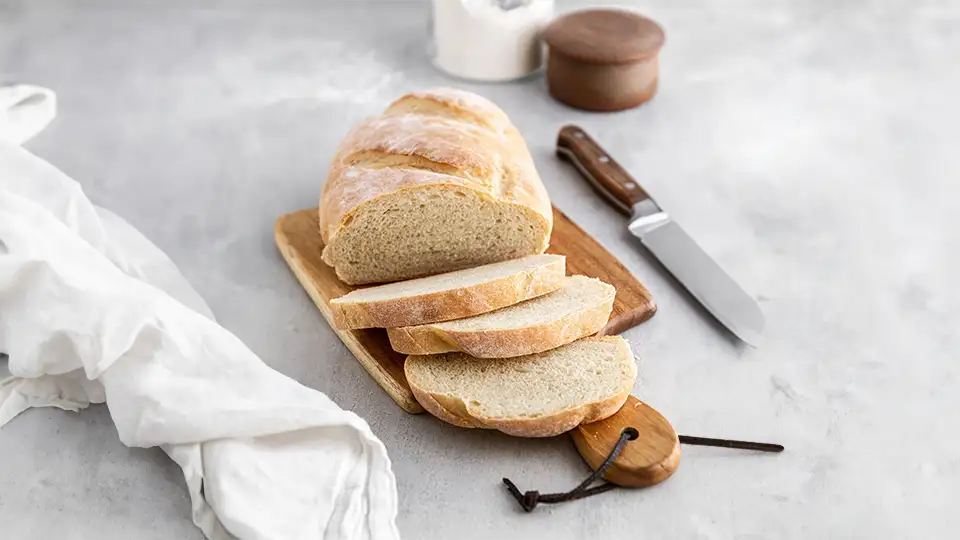
There’s something utterly exquisite about the smell of warm bread wafting through the air, isn’t there? It’s the kind of smell that warms the soul, promising a slice of comfort. And when it’s Italian bread we’re talking about, that warmth is infused with a dash of spice—passion and history that’s been kneaded into every golden brown crust. But don’t be mistaken, crafting the perfect Italian bread in your own kitchen isn’t just a case of mixing flour and water. It’s an art form, one that’s best appreciated when it’s made from scratch.

I’m here to guide you through the art of creating the freshest, fluffiest Italian bread dough from the cozy confines of your home. I’ll share the secrets that can elevate your dough from mere ingredients to the soul of an Italian meal, and the pride of your baking. Ready to roll up your sleeves and get your hands floury? Let’s create!ми
Italian Bread Dough

Ingredients
If you know anything about Italian cooking, you’d know that less is more; the finest ingredients for the most delicious results. For your homemade Italian bread dough, you’ll need:
Essentials:
- Bread Flour: The higher the protein content, the better. This ensures your dough has that chewy texture synonymous with Italian bread.
- Yeast: For leavening, get your hands on high-quality active dry yeast.
- Water: Fresh, at the right temperature, is a must—lukewarm for activating the yeast.
- Salt: A staple for flavor and controlling the yeast.
Optional Add-ins:
- Olive oil: Just a splash can add a beautiful richness to your bread.
- Herbs: Fresh basil, rosemary, or thyme for an aromatic kick.
- Honey or sugar: For a subtler sweetness than plain sugar.
- Semolina flour: For dusting the baking sheet to add a delightful crunch to the crust.
The beauty of making bread dough lies in its simplicity and its flexibility. You can go from a classic, plain dough to a herb-infused or sweetened one, but the essentials remain steadfast. It’s about finding your flavor within the framework.
Instructions
This is where precision and patience shine. The preparation of your Italian bread dough isn’t just a mechanical act; it’s a dance between your ingredients and you, ensuring each step is filled with care and purpose.
Step 1: Activating the Yeast
Begin by activating your yeast. In a small bowl, mix fresh, lukewarm water with your yeast and a pinch of sugar (the natural kind or fine grains). Allow it to sit for 5-10 minutes, until it’s bubbly, frothy, and emitting a lightly sweet aroma. This is the first sign that your yeast is alive and ready to breathe life into your flour.
Step 2: The Flour and Water Waltz
In a separate, larger bowl, combine your flour and salt. Here, you’re aiming for a cloud-like consistency—a soft, sticky dough that gives and takes under the pressure of your fingers.
Step 3: Kneading
On a floured surface, begin to knead your dough. Push down with the heel of your hand, fold the dough over, and give it a quarter turn. Repeat this motion, rotating the dough as it takes shape, for a good 10-15 minutes. You’re looking for a smooth, elastic texture that springs back when gently poked.
Step 4: The First Rise
Place your dough in a clean, oiled bowl (a drizzle of olive oil helps to prevent sticking). Cover with a damp cloth or plastic wrap, and leave it in a warm, draft-free place until it doubles in size—it could take anywhere from 1-2 hours.
After the first rise, you’ll notice the yeast has worked its magic. The dough is delicate and airy, and promises a texture that will make your taste buds sing. Now, on to the second act.
The Second Rise and Shaping
Punch your dough down, release the air, and transfer it back to your floured work surface. Shape it into the form you desire—be it the classic round or an elongated shape for a baguette. Place it on a baking sheet dusted with semolina or any flour, score the top, and cover again.
Allow the dough for the second rise; this time it’s a shorter stay, about 30 minutes. Preheat your oven to a piping hot temperature (around 425-450°F) with a baking stone inside if you have one, and have a small dish of water ready to create steam. This will ensure a crispy crust that you’d expect from an Italian bakery.
Baking
When the second rise is complete, put the sheet into the oven (be mindful to place it carefully on the hot stone if you have one). Quickly pour a cup of hot water into the dish to create an immediate burst of steam, and close the oven door.
Bake until that sweet smell fills your kitchen, and your bread is a deep, golden brown. It should take around 25-30 minutes, but keep an eye out—each oven is unique.
Congratulations, you’ve just made your very own Italian bread! A staple that is proof that dedication to simplicity holds the key to the most complex and delightful of dishes.

DID YOU MAKE THIS RECIPE?
Tag @amcookingitaliano on Instagram and hashtag it #amcookingitaliano!
Tips for Customization
Mastering the basics has its thrill, but customization is where your bread truly becomes yours. Here are some tips to personalize your Italian bread dough:
Flavor Fusions
Consider infusing your dough with sun-dried tomatoes or roasted garlic for an earthy undertone that pairs beautifully with pastas and salads.
Artful Additions
For a stunning presentation, top your dough with sliced olives or a dusting of parmesan before the final rise and baking.
Shape and Structure
The presentation is as important as the taste. Master the art of shaping your loaves, from the intricacies of intricate braiding to the simplicity of latticework.
Temperature Control
Ensure your kitchen is the perfect rising environment. If it’s chilly, heat your oven to its lowest temperature, then turn it off and use it as a proofing box.
Play with these elements and discover the endless possibilities your dough can offer. The beauty is in the act of experimenting and tailoring a loaf that is uniquely yours.
How to Store Italian Bread Dough
For those times when you’re not quite ready to bake, your Italian bread dough can be stored in the refrigerator. Make sure it’s in an airtight container and press a piece of plastic wrap directly onto the surface of the dough to prevent a skin from forming. It can keep for up to a week, sometimes even developing a richer taste as it sits.
Conclusion
Italian bread has more to offer than just being an accompaniment—it’s an ambassador of Italy’s culinary tradition. Making it at home isn’t just about the convenience or the economics; it’s about the satisfaction of knowing you’ve created something that’s fed families for generations, and will continue to do so, all from the heart of your own kitchen.
The beauty of this simple recipe is the many shapes and flavors it can take on, each maintaining that classic Italian character with a twist that’s all your own. Whether you’re dipping it in a comforting bowl of minestrone or letting it soak up the sauce of a hearty braciola, your homemade Italian bread will be the star of the show.
Buona fortuna—good luck—and may your dough be as light as your spirit when you tiptoe through this Italian culinary tradition.
FAQs
Can I freeze Italian bread dough?
Yes, you can freeze Italian bread dough. Portion it into smaller loaves or rolls, wrap tightly in plastic wrap or foil, and store in an airtight container or freezer bag. To use, thaw in the refrigerator overnight and allow it to come to room temperature before the second rise and baking.
Why do I need to create steam when baking the bread?
Steam during the initial baking stage prevents the crust from setting too quickly, allowing the bread to rise fully. It also helps create a wonderfully crispy crust—a trademark of Italian bread.
What can I use leftover Italian bread for?
Leftover Italian bread is perfect for making homemade croutons, bread crumbs, or panzanella salad. It’s also great for soaking up sauces or creating a decadent bread pudding.
Can I use all-purpose flour instead of bread flour?
While you can use all-purpose flour, bread flour contains more protein, which gives Italian bread its characteristic chewy texture and helps create a better crust. If you do use all-purpose flour, you may need to adjust the amount of liquid in the recipe.