There’s a certain kind of magic that unfolds in the kitchen when you’re whisking up a recipe that’s been passed down through generations. In the case of Ricotta Chocolate Pasticciotti, it’s the spellbinding aroma of vanilla and citrus zest wafting through the air, blending with the rich, creamy filling that has an allure few can resist. This delectable dessert is a jewel in the crown of Italian pastries, and its timeless appeal lies in its beautifully simple ingredients that burst with flavor and sentiment.
In this blog, I invite you to join me on a culinary odyssey through the heart of Italian sweets, as we uncover the story behind Ricotta Chocolate Pasticciotti and the art of making them from scratch. Whether you’re already a fan of this delightful treat or you’re looking to expand your baking repertoire, I promise that this step-by-step guide, filled with my personal tips and tricks, will leave you with a plate of pasticciotti that could rival those found in the bakeries of Apulia.
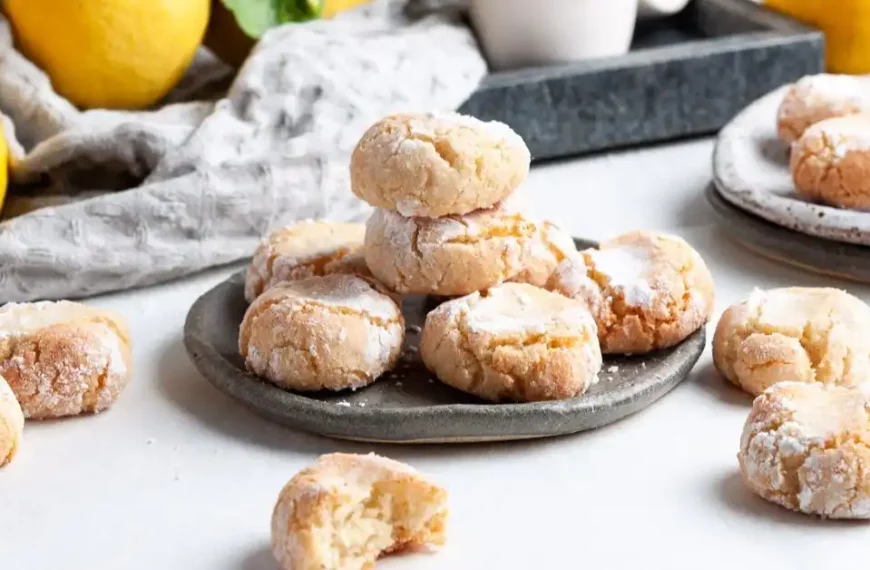
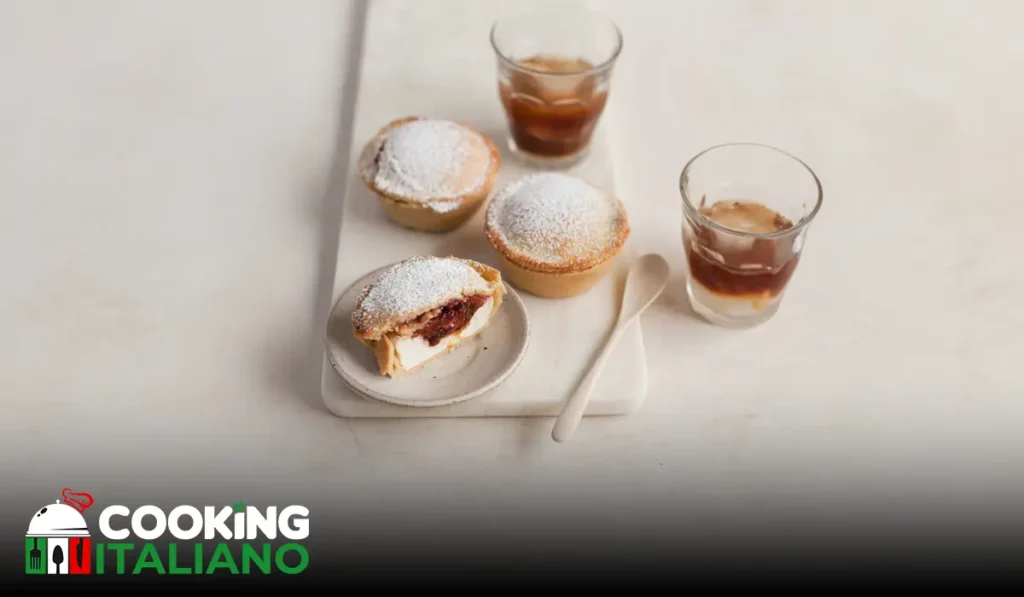
Ricotta Chocolate Pasticciotti
Ingredients
Before you even think about heating up the oven, it’s crucial to assemble the right ingredients for your Ricotta Chocolate Pasticciotti. Traditionally, these sweet little pies are made with a flaky and slightly sweet pastry crust filled with a luscious mixture of ricotta, chocolate, and hints of vanilla and citrus. Here’s what you’ll need:
For the Pastry:
- 3 cups of all-purpose flour
- 1 cup of sugar
- 1 cup of unsalted butter, chilled and cubed
- 3 large eggs
- Zest of one orange
- Zest of one lemon
- A pinch of salt
For the Filling:
- 2 cups of ricotta cheese
- 1 cup of granulated sugar
- 3 large eggs
- 1 teaspoon of vanilla extract
- Zest of one lemon
- 1/2 cup of semisweet chocolate chips or chopped chocolate
Additional:
- Some butter for greasing the tart molds
- Powdered sugar for dusting
With these staples in your culinary arsenal, you’re ready to start creating little pockets of heaven that your taste buds—and your loved ones—will adore.
Instructions
Now, the art of Pasticciotti lies in their construction. It’s a careful dance between the dough, the shaping, and the filling that results in the perfect balance of textures and flavors. Here’s my detailed guide to ensuring your pasticciotti turn out just right.
Step 1: The Pastry
Begin by making the pastry. In a large mixing bowl, combine the flour, sugar, and salt. Add the chilled, cubed butter and mix it into the dry ingredients using a pastry cutter or your fingers, until the mixture resembles coarse crumbs.
Next, form a well in the center of the mixture and add the eggs, orange zest, and lemon zest. Gently knead the dough until it comes together. Be careful not to overwork it, as you don’t want the butter to melt—that’s what will give you the perfect flaky texture.
Divide the dough into two portions—two-thirds for the bottoms, and one-third for the tops. Then, wrap each portion in plastic wrap and chill in the refrigerator for at least one hour, or until firm.
Step 2: The Filling
In another bowl, combine the ricotta, sugar, eggs, vanilla extract, and lemon zest. Mix until everything is well incorporated and the mixture is smooth. Then, fold in the chocolate chips.
Step 3: Assembly
Preheat your oven to 350°F (175°C). Take the larger portion of dough out of the refrigerator. On a lightly floured surface, roll it out to about 1/8 inch thickness. Using a large round cutter or the mouth of a glass, cut out circles of dough that are just slightly larger than the molds.
Grease your molds with butter, and then line the molds with the pastry circles. Press the pastry gently into the bottom and up the sides of each mold, letting any excess dough hang over the edge.
Fill each pastry-lined mold with a generous scoop of the ricotta mixture, but be sure not to overfill—leave about 1/4 inch of space at the top for the lids. Then, roll out the smaller piece of dough and cut out smaller circles for the tops. Lightly brush the edges of the pastry in the molds with a little water, place a lid on top, and press to seal, crimping the edges decoratively with your fingers or a fork. Pierce the tops of each pasticciotto with a fork to allow steam to escape while baking.
Step 4: The Bake
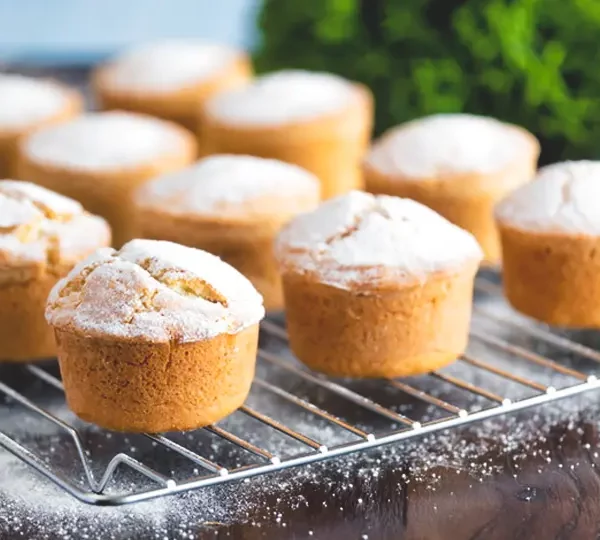
Place the filled pasticciotti on a baking sheet and bake for about 20-25 minutes or until the pastry is golden and the filling is set. Allow the pasticciotti to cool in the molds for a few minutes, and then transfer them to a wire rack to cool completely.
Once cooled, dust the pasticciotti with powdered sugar for a sweet finish. Your Ricotta Chocolate Pasticciotti are now ready to be devoured, and trust me when I say, they won’t last long!

DID YOU MAKE THIS RECIPE?
Tag @amcookingitaliano on Instagram and hashtag it #amcookingitaliano!
Tips for Customization
While the classic recipe is a winner, it’s always fun to put your own twist on traditional dishes. Here are some creative ideas to make your Ricotta Chocolate Pasticciotti even more unique:
- Try different types of chocolate or add nuts for extra texture.
- Use a different cheese like mascarpone for a creamier filling or a slightly tangy cheese for a more complex flavor.
- Play with the citrus zest; grapefruit or lime can offer an interesting break from the classic orange and lemon zest combination.
Customizing your pasticciotti is a wonderful way to experiment with flavors and make the recipe your own. Don’t be afraid to get creative!
How to Store Your Pasticciotti
If, by some miraculous feat of strength and willpower, you have pasticciotti left over, you’ll want to store them properly to keep them fresh.
- Store your pasticciotti in an airtight container in the refrigerator for up to 3 days. Ensure they are at room temperature before serving.
- You can also freeze the pasticciotti for longer storage. Once they are completely cool, wrap them tightly in plastic wrap and store in an airtight container in the freezer for up to 3 months. To eat, thaw in the refrigerator and warm in a low-temperature oven until heated through.
Proper storage ensures that every bite is as delicious as the day you baked them.
Conclusion
The kitchen is the cultural crossroads of the world, and in its hallowed halls, we have the privilege to savor and create recipes that have traversed the seas and the sands of time. The Ricotta Chocolate Pasticciotti is just one of these treasures, a confection that embodies the spirit of Italy and the art of baking in one delightful package.
I hope this culinary adventure has inspired you to roll up your sleeves, grab some flour, and explore the world of Pasticciotti making. There’s no doubt that the warm, flaky crust and the creamy, rich filling will not only satiate cravings but also ignite a passion for creating and sharing food that resonates through the ages. Buon Appetito!
FAQs
Why are they called “Pasticciotti”?
The word “pasticciotto” comes from the Italian word “pasticcio,” which means a mess or a mix. It’s derived from the idea that these little pastries were originally made to use up leftover custard. Over time, the recipe evolved into the delectable dessert we know today.
Can I make the dough in advance?
Yes, you can prepare the dough for the pasticciotti several days ahead of time. After preparing the dough, wrap it in plastic and store it in the refrigerator for up to three days. You can also freeze the dough for up to a month.
What’s the best way to serve Pasticciotti?
Pasticciotti are best enjoyed with a cup of freshly brewed coffee, especially as part of a leisurely Italian breakfast. You can also serve them as a delightful dessert, perhaps accompanied by a scoop of vanilla gelato. No matter how you serve them, they are sure to be a hit!