Imagine a velvety, smooth custard topped with golden brown caramel, the perfect contrast to its rich, creamy flavor. This beloved dessert, known as flan or caramel custard, is a timeless classic in the world of sweets. Learn to make this luscious treat at home with our guide, complete with tips to elevate your cream caramel experience. Embark on a gastronomic journey through the land of sweet bliss and indulge in this delectable delight.
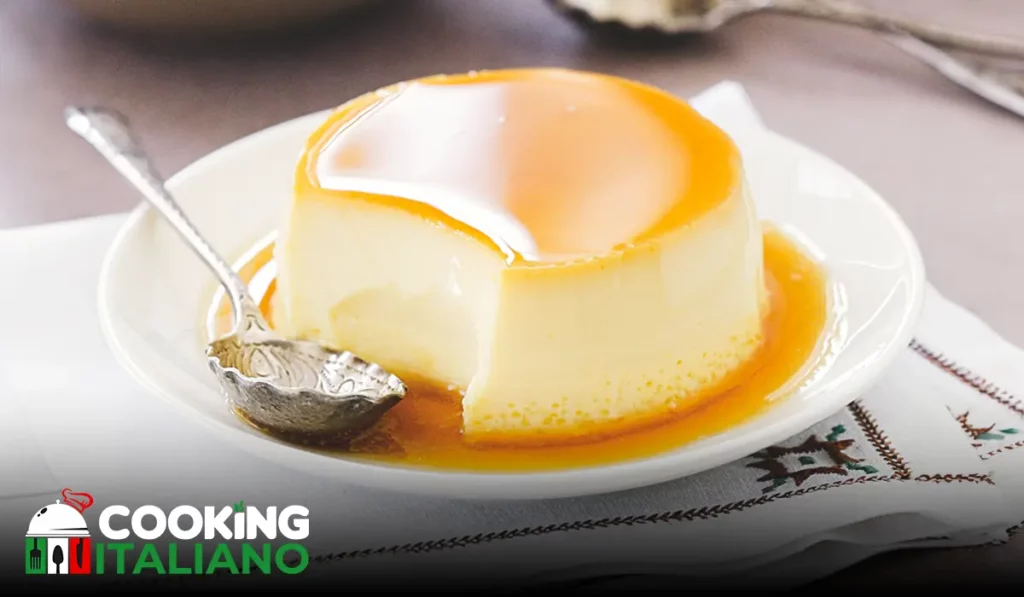
In this comprehensive guide, we share the secrets to creating the perfect flan – a delightful combination of creamy goodness and caramel sweetness. Let us guide you through the process, sprinkling in personalized tips to enhance your cream caramel to a whole new level of culinary delight. Dive into the world of unctuous bliss and savor every moment of this gastronomic adventure.
Cream Caramel
Ingredients
To make a modest-sized cream caramel that serves 6 to 8, gather these ingredients:
- For the Caramel
- 1 cup of sugar
- 1/3 cup of water
- For the Custard
- 4 large eggs
- 1 can (14 ounces) of sweetened condensed milk
- 2 cups of whole milk
- 1 teaspoon of pure vanilla extract
Optional Enhancements
Now, if you’re willing to kick things up a notch, consider including these additional ingredients:
- For the Caramel
- A sprinkle of sea salt to turn your caramel into a “salted” affair
- For the Custard
- 1 cup of heavy cream for a denser texture
- A pinch of ground cinnamon for a hint of warmth
- A zest of an orange to add a bright, citrusy note
The beauty of this dessert lies in its simplicity, so don’t hesitate to play with ingredient ratios based on your personal preference. Remember, cooking is an art, and a recipe merely offers guidance.
Instructions
This part of the process is where you create the magical layers that will eventually meld into a single, irresistible taste.
Caramel Preparation
- Begin by combining the sugar and water in a saucepan over medium heat. Swirl the pan occasionally to mix, but avoid stirring, as it can cause the sugar to crystallize.
- Watch the syrup slowly turn from clear to golden. This caramelization process can take about 10-12 minutes. You’re aiming for an amber color — which equates to a deeper flavor profile — but be sure not to burn it.
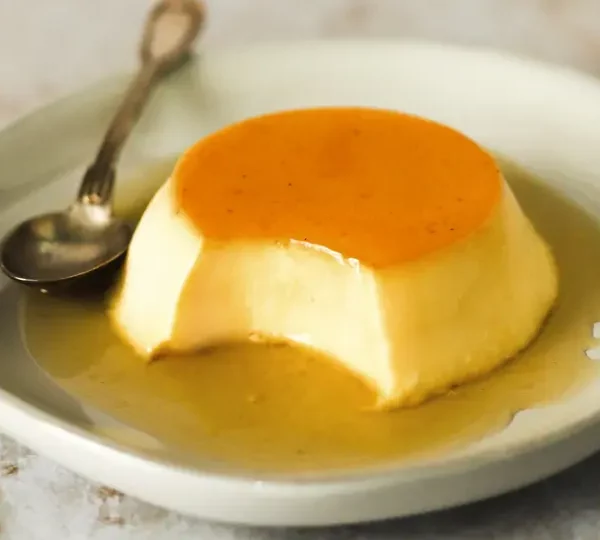
- Once your syrup has reached the perfect hue, immediately pour it into your mold — a cake tin or individual ramekins will do. Tilt the mold around to evenly coat the bottom with the molten caramel before it sets, creating a glassine layer.
Making the Custard
- Preheat the oven to 350°F (175°C).
- In a mixing bowl, whisk together the eggs, sweetened condensed milk, and whole milk until smooth. Now is the opportune moment to add in any creative touches, like vanilla or orange zest.
- Carefully pour the custard mixture over the back of a spoon into the prepared caramel-coated mold. This method prevents bubbles from forming and marring the custard’s surface.
- Place the mold into a larger roasting pan and add hot water until it reaches halfway up the sides of your cream caramel mold. This water bath, also known as a bain-marie, ensures gentle, even cooking.
- Bake the cream caramel for about 45-60 minutes, or until the custard is set. You can verify this by gently shaking the pan — the middle should jiggle like firm Jell-O.
- Once done, remove the cream caramel from the water bath and cool at room temperature for 30 minutes. Then, chill in the refrigerator for at least 4 hours or preferably overnight.

DID YOU MAKE THIS RECIPE?
Tag @amcookingitaliano on Instagram and hashtag it #amcookingitaliano!
Tips for Customization
The versatility of cream caramel makes it an ideal canvas for creative customization. Here are several ways you can personalize your confection:
Vary the Texture
Interested in a cream caramel that’s richer and more velvety? Substitute some or all of the milk with heavy cream, adjusting to your preferred density. You could even try using different types of milk, like evaporated or goat’s milk, for unique textures.
Experiment with Flavors
The classic combination of vanilla and caramel is divine, but there’s a world of flavors waiting to be explored. From almond and coconut extracts to espresso or rum, the possibilities are as vast as your imagination. Just a teaspoon or two of your chosen flavoring can add a wonderful twist to your cream caramel.
Consider Substitutes
For those with dietary restrictions, cream caramel can still be on the menu. For a lactose-free version, almond or coconut milk combined with dairy-free condensed milk can mimic the original taste quite well. No eggs? A flax or chia seed “egg” mixture can work wonders as a binder.
Pay Attention to the Caramel Color
The color of your caramel can dramatically impact the final look and taste. Light caramel will give a milder flavor and appear more yellow. Meanwhile, a darker hue is richer and has a slight bitter undertone. It’s worth experimenting to discover your perfect shade.
How to Store
Once your cream caramel has cooled and set, it’s important to store it correctly to preserve its texture and taste. Tightly wrap the caramel in plastic to prevent it from absorbing other flavors in the fridge. Enjoy within a week for the best results, though it’s likely to be devoured long before then!
Conclusion
The art of making cream caramel is as much about patience and precision as it is indulgence. Each step, from crafting the perfect caramel to achieving the ideal custard texture, requires a gentle touch and a keen eye. Yet, the true reward comes with the first, richly satisfying bite — a jubilant affirmation of your culinary prowess.
Give it a try, and you’ll find that preparing this dessert is not only an act of love for your taste buds but also an enjoyable, therapeutic process. Share it with friends and family, or savor it as a personal triumph of kitchen mastery.
FAQ
What if my caramel hardens too much?
If your caramel turns into a tooth-cracking hard shell, it might have caramelized for too long. To soften it, return the mold to very low heat on the stove, swirling the mold until the caramel begins to liquify. Be cautious not to overheat, as the caramel can quickly burn.
Can I reheat my cream caramel?
Absolutely! A short burst in the microwave or low heat on the stove is all it takes. Just be sure to do it gradually, checking the texture often, to prevent overcooking and turning the custard rubbery.
Can I make individual servings?
Of course! Ramekins or other small, oven-safe dishes are perfect for creating individual portions. Reduce the baking time accordingly, checking for doneness after around 30 minutes.
What if my custard is undercooked or overcooked?
If your custard is undercooked, it will be runny. Pop it back in the oven for another 10-15 minutes, regularly checking for the right consistency. If it’s overcooked, the custard becomes rubbery; unfortunately, there’s no going back. Just learn from the mistake for next time.
Remember, practice makes perfect. Experiment with different techniques and flavor combinations to create a cream caramel that’s uniquely your own. The joy of cooking is in the never-ending process of learning and refining, and there’s no better place to start than with this timeless dessert. Enjoy the sweet adventure!